
Here we will go over the installation process for the OptiFine mod, which greatly helps game performance and allows the use of shaders!
⚠️ WARNING: OptiFine is a CLIENT-SIDE ONLY mod. This means you only have to install it on your local installation of Minecraft in order for it to work. Attempting to add this mod to a server can cause it to crash!
What Is OptiFine?
OptiFine is a client-side Minecraft mod designed to improve performance and give you more control over the game’s graphics settings. It adds additional video options that can help increase FPS, especially on lower-end computers, while also supporting features such as custom textures, connected textures, and shader packs.
Because OptiFine only changes how Minecraft runs and looks on your computer, it does not need to be installed on the server you play on.
Downloading OptiFine
Downloading OptiFine is easy. You can find their list of downloads from this link.
From there, choose whichever version you wish to download. In this case, I'm going to install OptiFine HD U J3 for Minecraft 1.21.4.
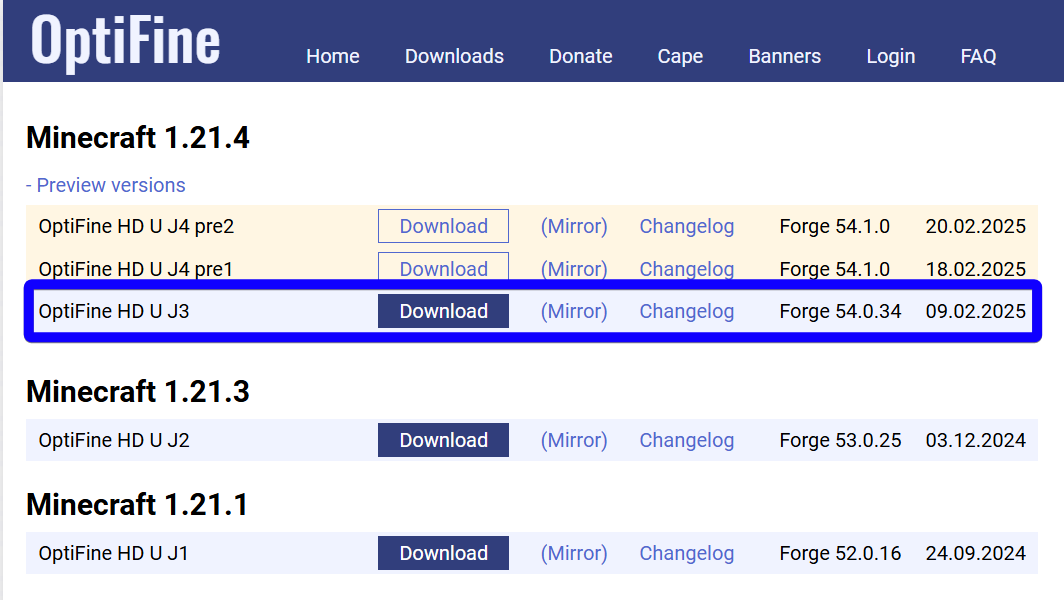
You'll be taken to a new page. Wait a few seconds, then press the Skip button in the top-right corner to get to the download page for the version you've selected.
Be sure your Forge version matches the version listed for the OptiFine download as well. In our case, it will be Forge 54.0.34.
Finding Your Mods Folder
Now that we've gotten the file we need, we'll need to find our mods folder. In this case, I'll use CurseForge to get to my mods, but if you're not using that, you can find it in %AppData%\.minecraft\mods, assuming you already have Forge installed.
For CurseForge, find your modded profile and right-click it, then press Open Folder.
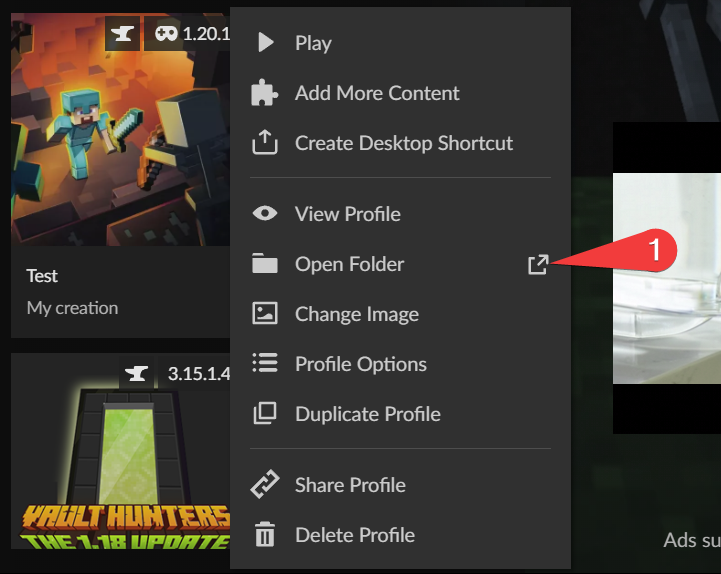
Installing OptiFine
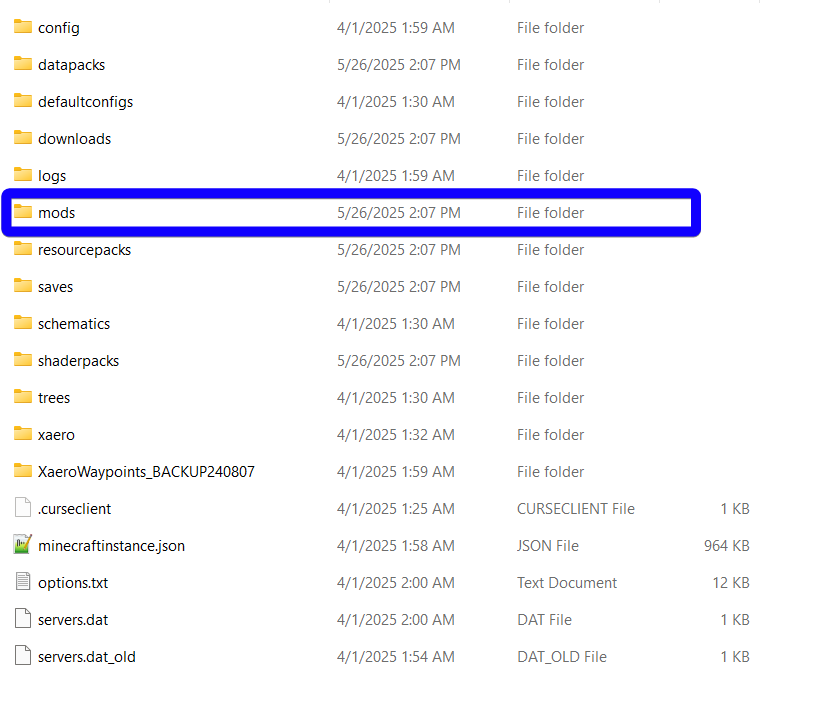
Open the mods folder inside your Minecraft or CurseForge profile folder.
Then, drop your downloaded OptiFine file into the mods folder. It may not look exactly like ours, but it should be close enough.
Once you have the mod in there, launch the profile. You should notice more options in the Video Settings menu, along with the OptiFine version displayed in the bottom-left corner.
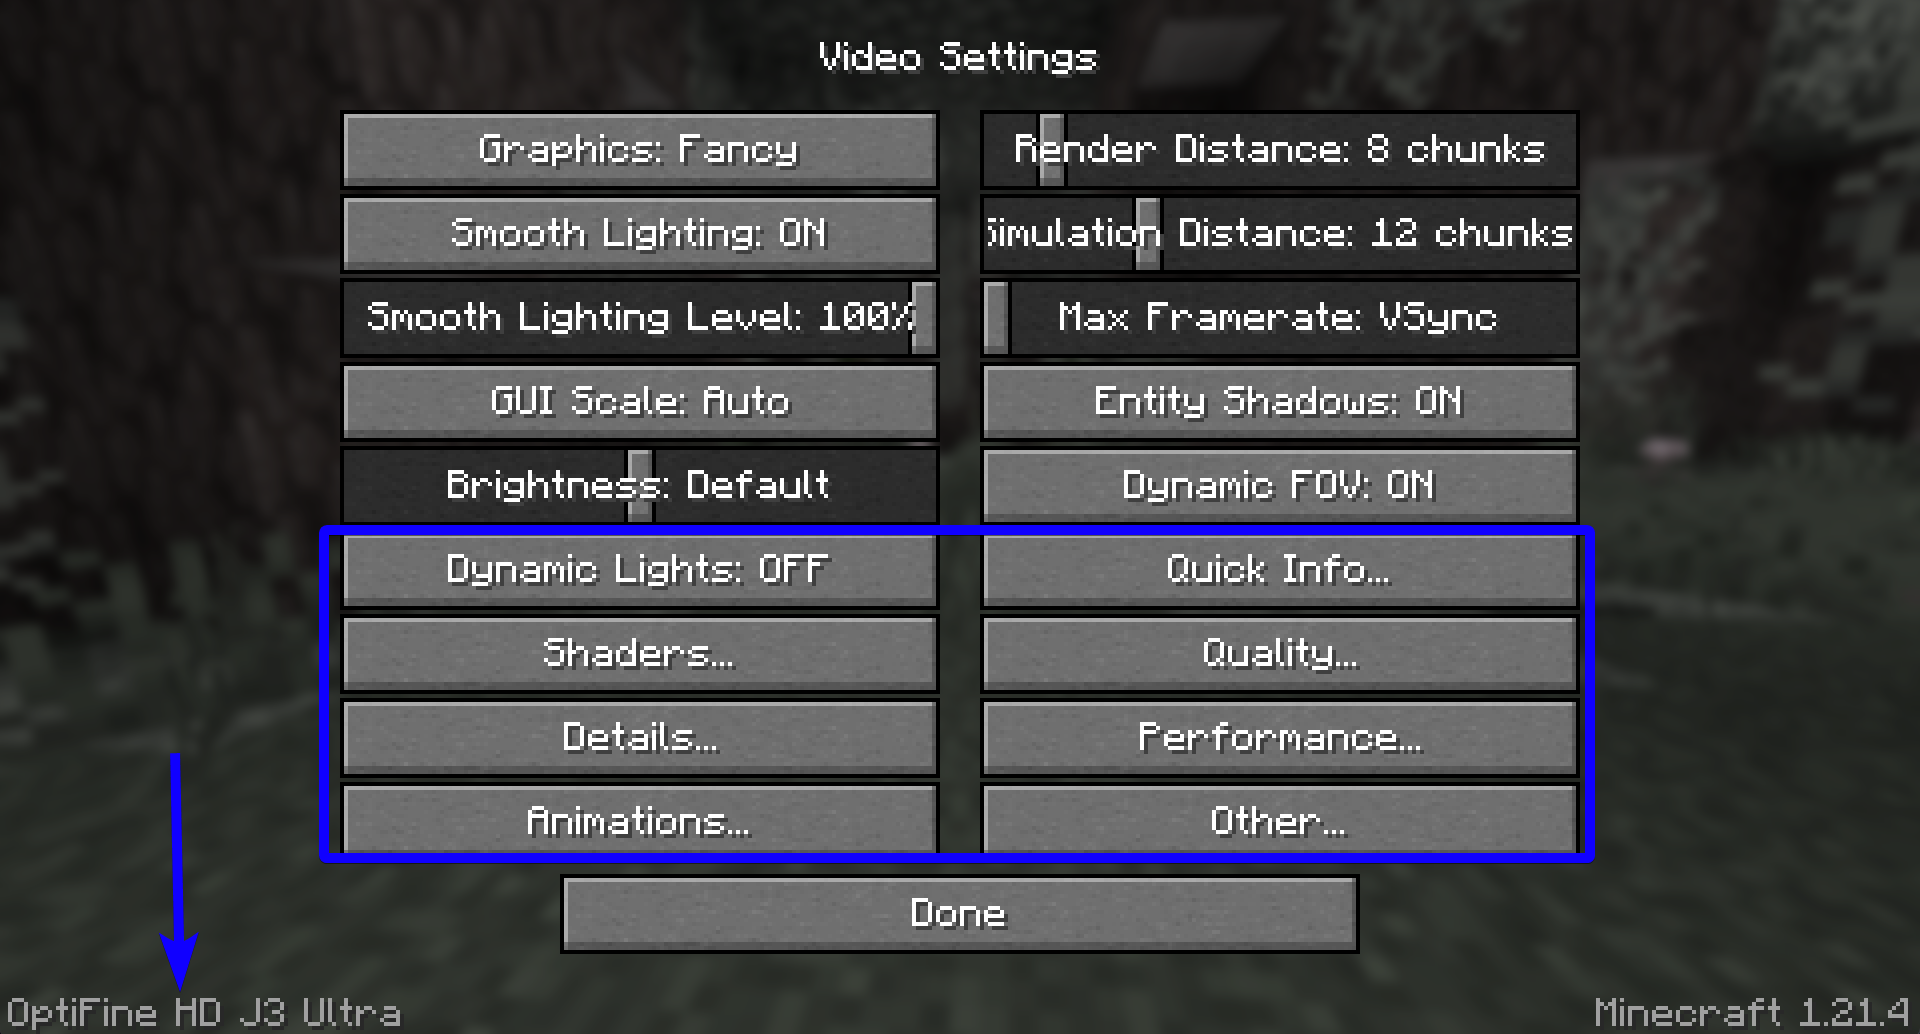
Installing Shaders with OptiFine
Now that OptiFine is installed, you can also use it to install shader packs. Shader packs can change Minecraft’s lighting, shadows, water, skies, and other visual effects.
First, download a shader pack that supports your version of Minecraft. Once downloaded, launch Minecraft and go to:
Options > Video Settings > Shaders
From there, click Shaders Folder and place the downloaded shader pack file into the folder that opens. You usually do not need to extract the file.
Return to Minecraft and select the shader pack from the list. It may take a few moments for the shader to load.
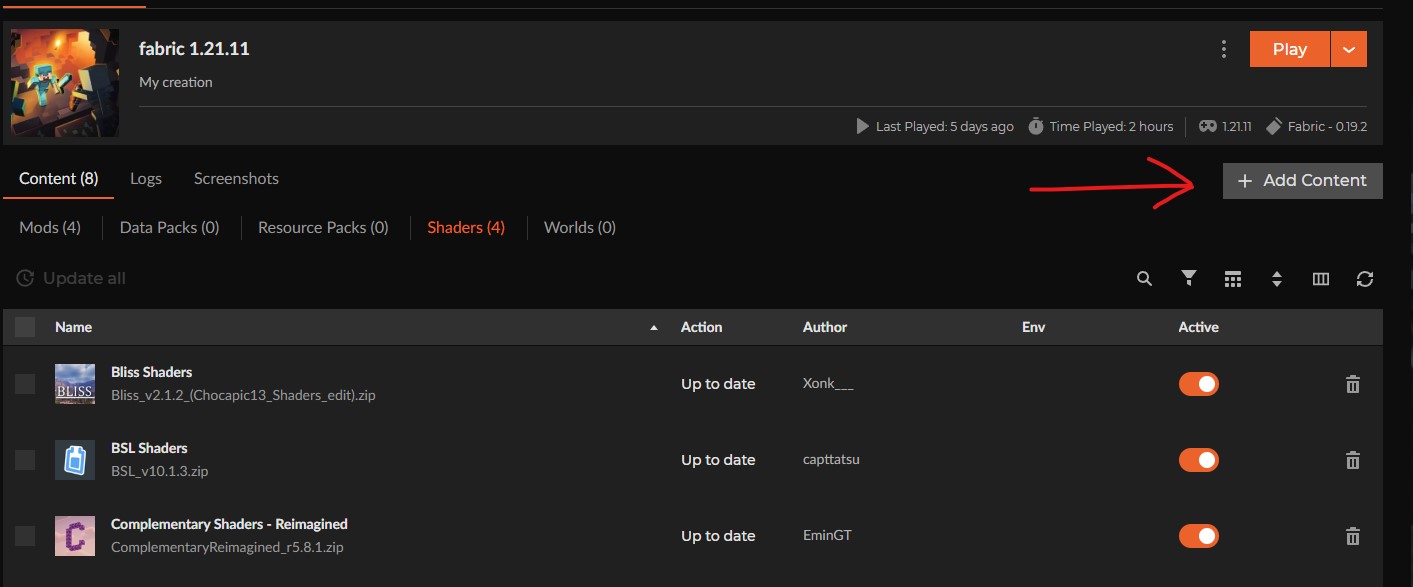
You can also install Shaders directly through the curseforge app with the "Add Content" menu.
Shader Performance Tips
Keep in mind that shaders can have a significant impact on performance. If your FPS drops too much, try lowering the shader quality, reducing your render distance, or choosing a lighter shader pack.
You can also return to the Shaders menu and select Off at any time to disable your shader pack without uninstalling it.
You're now ready to use OptiFine’s additional video settings and install shader packs to customize the way Minecraft looks and performs!